Import existing auths
This page illustrates the steps involved in importing existing authentications from your infrastructure to Tray.
The primary use case for this process is that your End Users have already created authentications and you do not want them to have to make them again.
Prerequisites
You will need a corresponding Tray user for each End User you wish to create an auth for. Once you have created a user, you will generate their access token, which is sent as an Authorization header for creating auth.
To create a user and their token, refer Create users and tokens page.
The import process
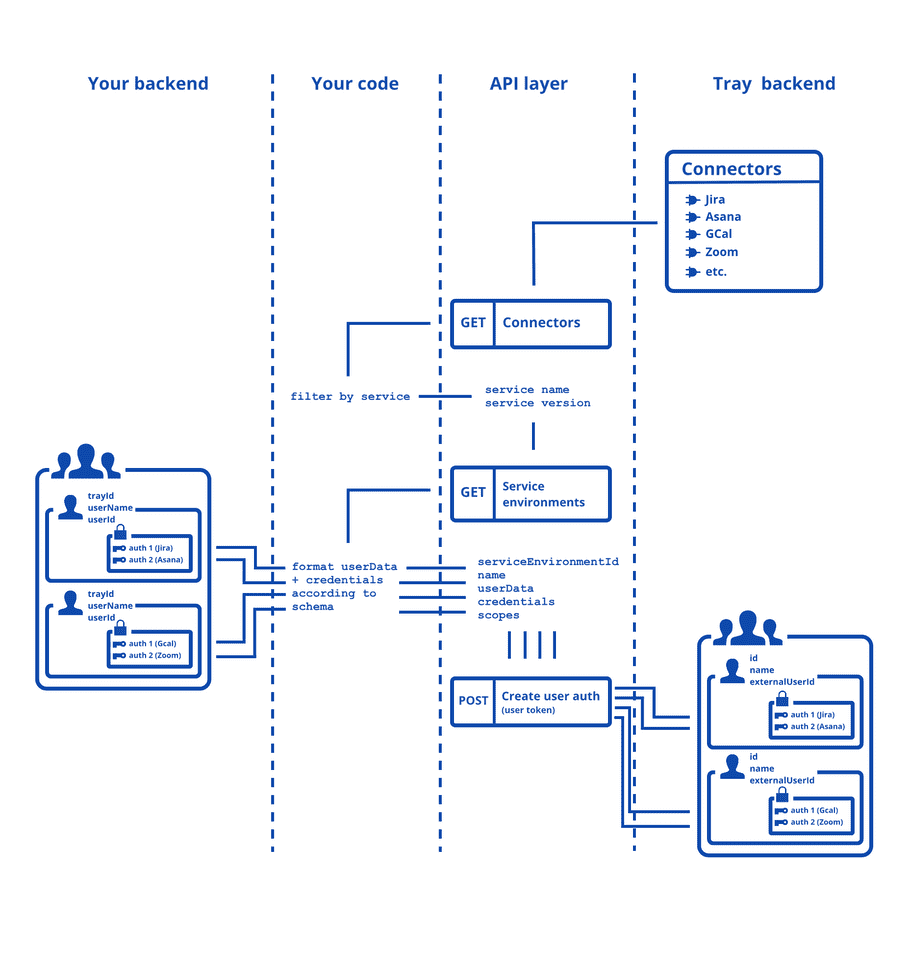
To import, you will make use of the following endpoints.
- Get connectors (master token)
- Get service environments (master token)
- Create User authentication (user token)
Importing with a user token means that each auth will be associated with the correct user:
Step-by-step guide
1. Get service details
You need to find the relevant 3rd party service connector for the service whose auth you want to import. You can do this through GET connectors call.
Let's say you want to import a Slack auth. You can filter the Connectors array for the service and grab the serviceId, serviceName, serviceVersion.

2. Get service environment details
warning
If the service you are trying to import an auth for is an OAuth service, you will first have to Create the service environment.
A service environment is automatically created when you create an auth using Custom OAuth app inside the Tray builder. Currently this is the only way to create a service environment for an OAuth service.
Next step is to get the details of the service environment, including serviceEnviromentId and the schemas for credentials and userData, which are crucial to perform the create authentication call later.
Example 1: Airtable
Here's how Airtable's serviceEnviromentId, credentials, and userData schema translate to the payload for Create Authentication:

Example 2: Mailchimp
Here's how Mailchimp's serviceEnviromentId, credentials, and userData schema translate to the payload for Create Authentication:

3. Create authentication
The final step is to use the Create Authentication endpoint after preparing the body of the request as given by response of step 2.
Here's how the request payload would look for a Mailchimp auth import:
{
  "name": "Bolo's mailchimp auth 2023",
  "userData": {},
  "credentials": {
    "access_token": "a22xxxxxxxxxxxxxxxxx8a1c-us21",
    "dc": "us21",
    "expires_in": 3600
  },
  "serviceEnvironmentId": "474axxxx-xxxx-xxxx-xxxx-xxxx90088d70",
  "scopes": []
}{
"id": "0490xxxx-xxxx-xxxx-xxxx-xxxxf21243cf"
}